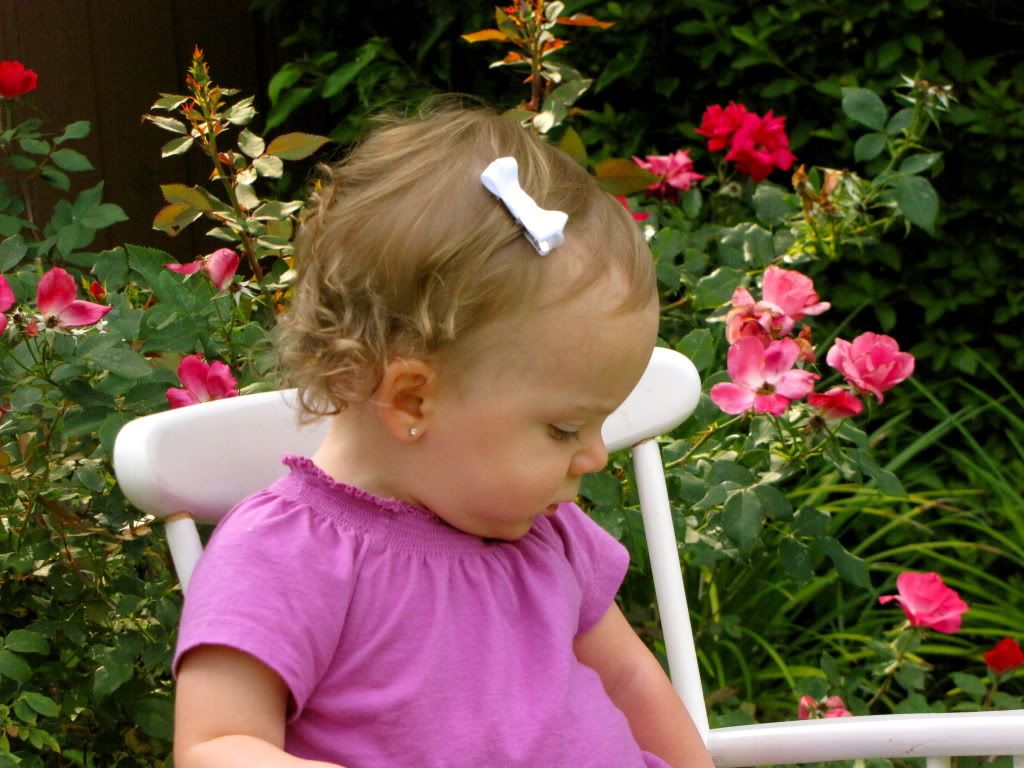
I mentioned in my last post that I was going to be posting a tutorial of how I made Riley's first bows. So far, Riley has 4. Seeing that I still have about 25 spools of ribbon that I haven't used for this project, I'd say she's got more on the horizon. In case you have a little one who's just getting enough hair for her first bows, I wanted to share how I made Riley's.
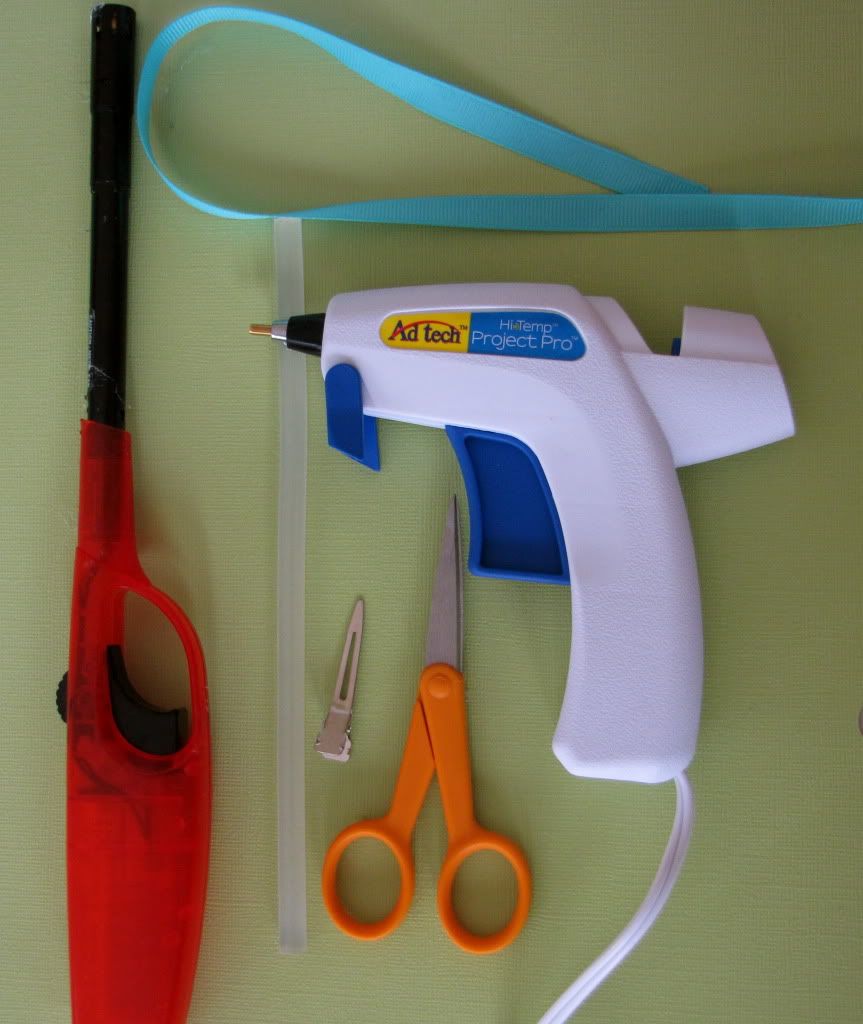 You'll need:
- alligator clip (or some other barrette)
- hot glue gun and glue (fabric glue would work)
- ribbon (I used 3/8" grosgrain)
- scissors
- lighter (to heat seal the end of ribbons)
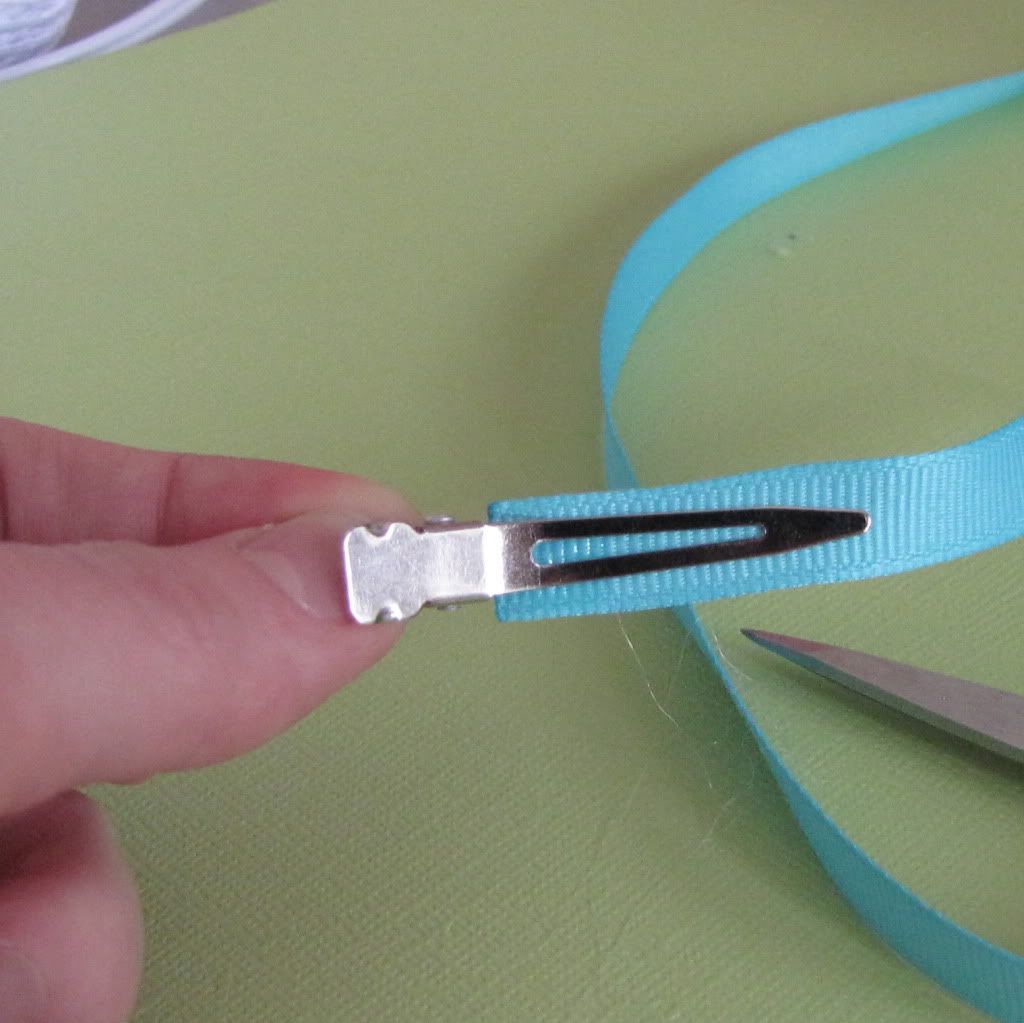
The first thing you'll do is fully line your alligator clip. I'm pretty sure my way of doing this is unconventional, but it works for me. The first thing I do is to seal one end of the ribbon and keep the other attached to the spool. Then, I put a tiny dab of hot glue as close to the edge of the ribbon as possible. When I do that, I sandwich the ribbon between the prongs of the clip to hold it in place (as shown in the picture below.
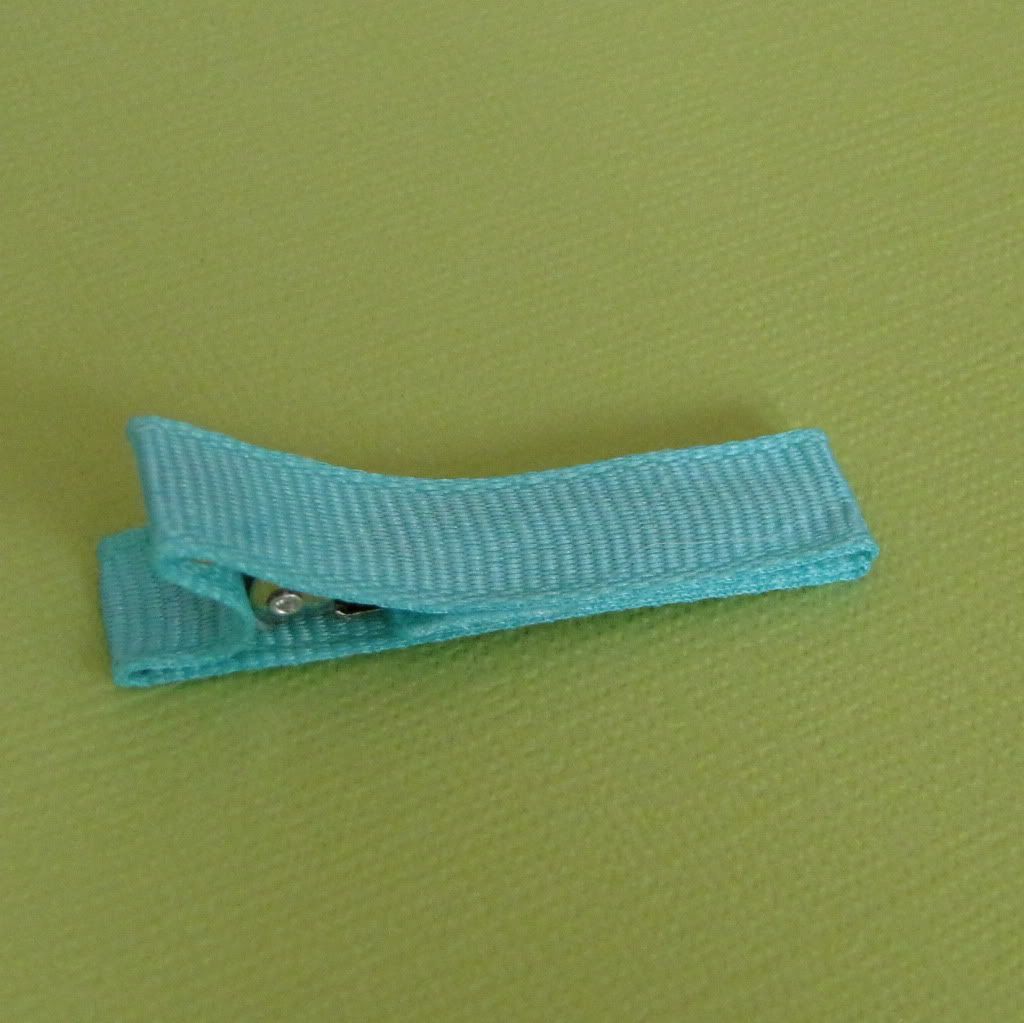
After that, I keep working my way around until I just have the last inside portion to glue down. I cut it to the correct length, seal it, and secure it with hot glue. Regardless of how you do it, here's the desired result:
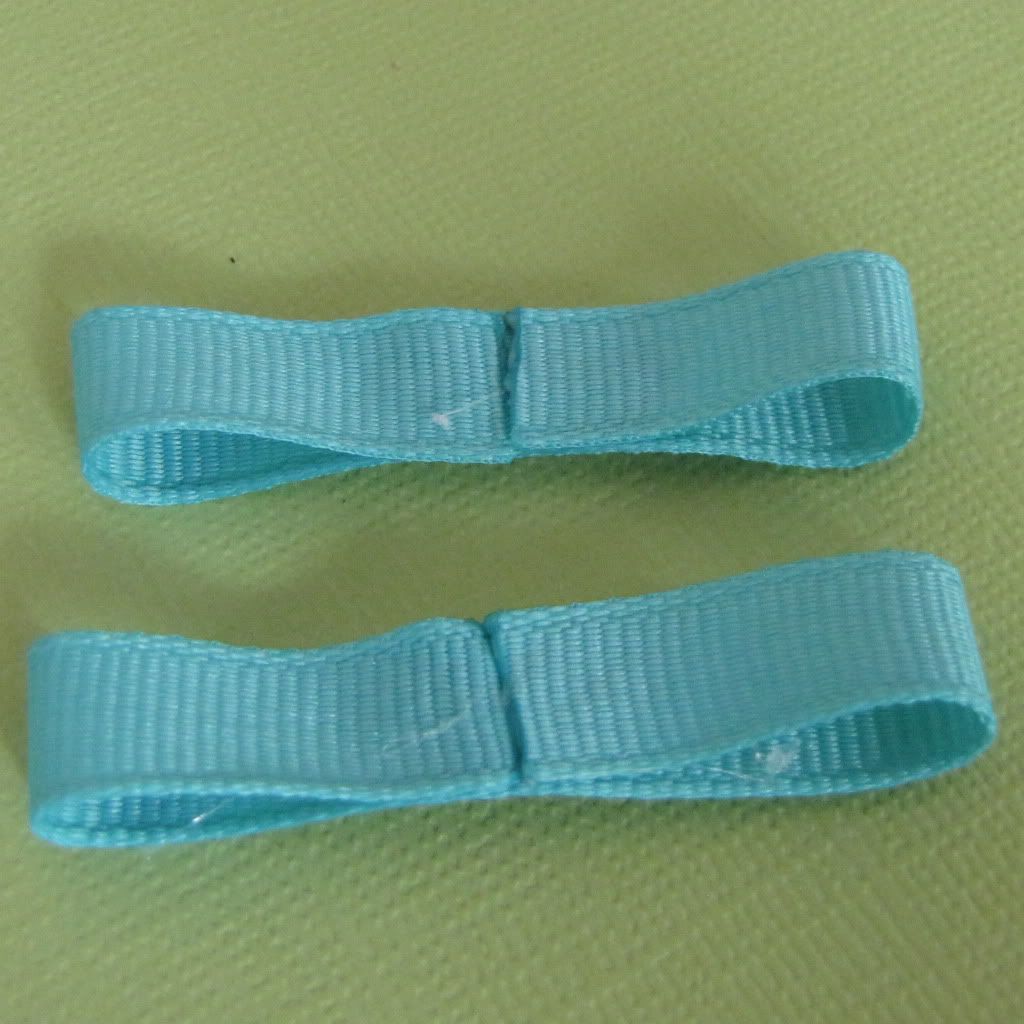
The next thing you'll want to do is to cut two identical pieces of ribbon (I cut mine about 4.5 inches long). Once you've done that, fold your ribbon in half and use your fingernails to make a crease in the middle.
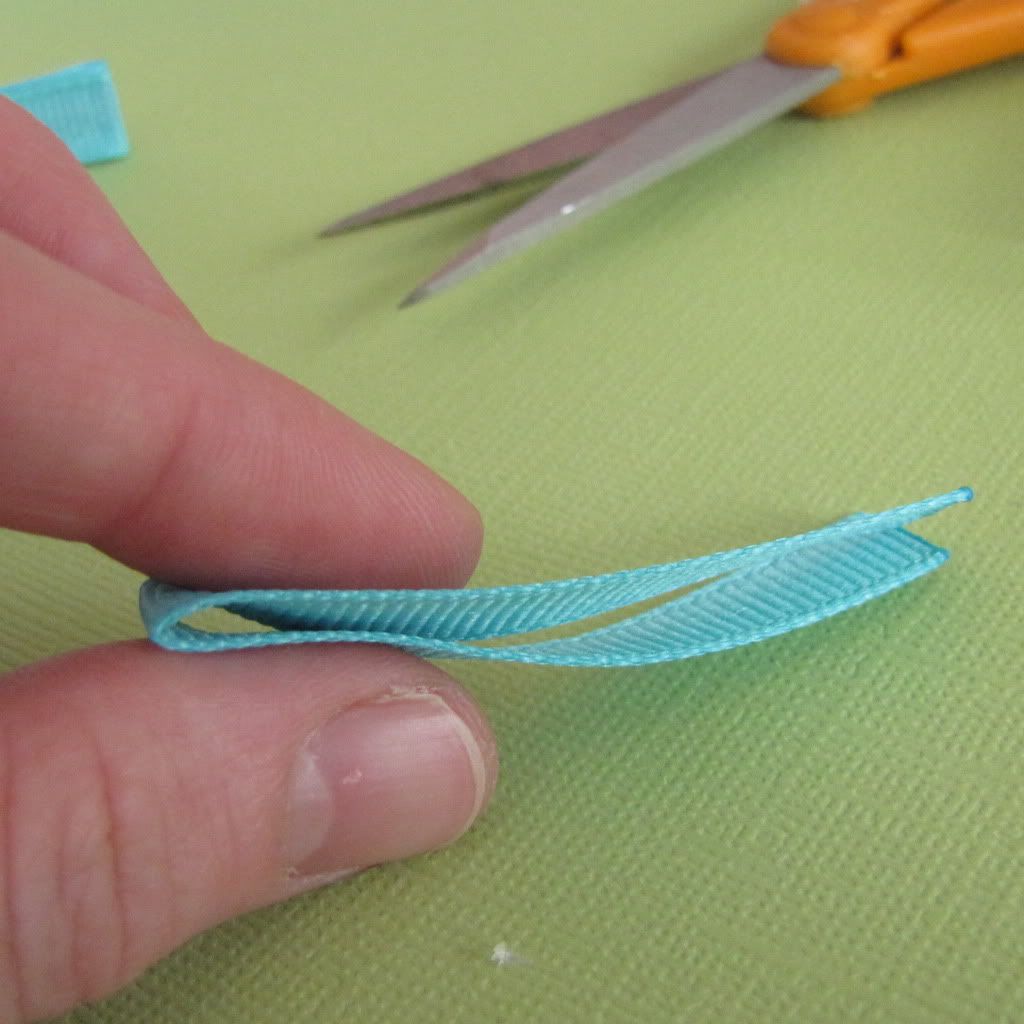
Glue each end of your ribbon to the middle. You should have two pieces like the ones shown in the following picture.
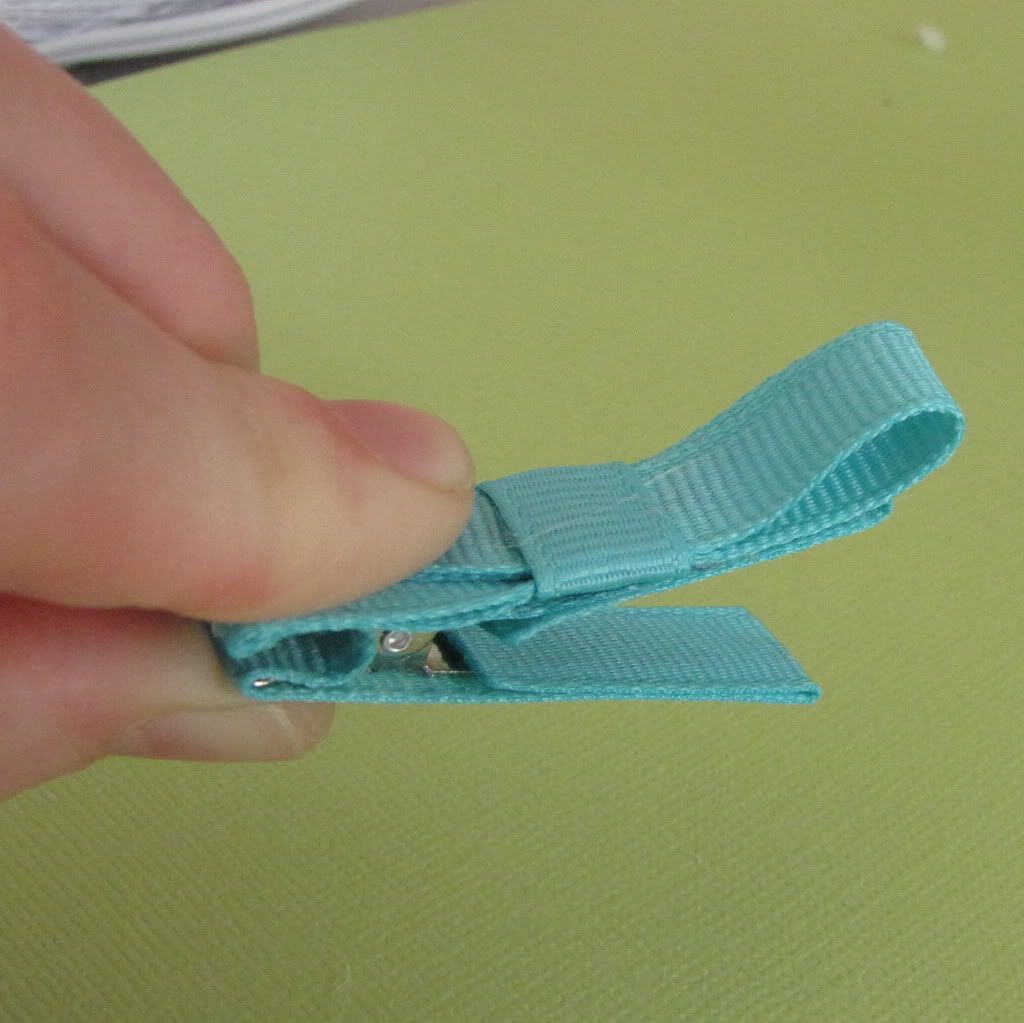
Now arrange your loops on top of one another (I do seams facing each other so you can't see them from either side) and hot glue them together. Once you've done that, you need to cut a piece of ribbon about 1 1/4" and heat seal the ends. Then, glue the middle of the small piece to the center of your bow. Glue the flaps to the back of your bow.

Now, all you need to do is attach it to the lined clip.

Since my baby's hair is fine, I put a few dabs of hot glue along the flat side of the alligator clip (inside). This makes it "no-slip" and keeps it securely in place.
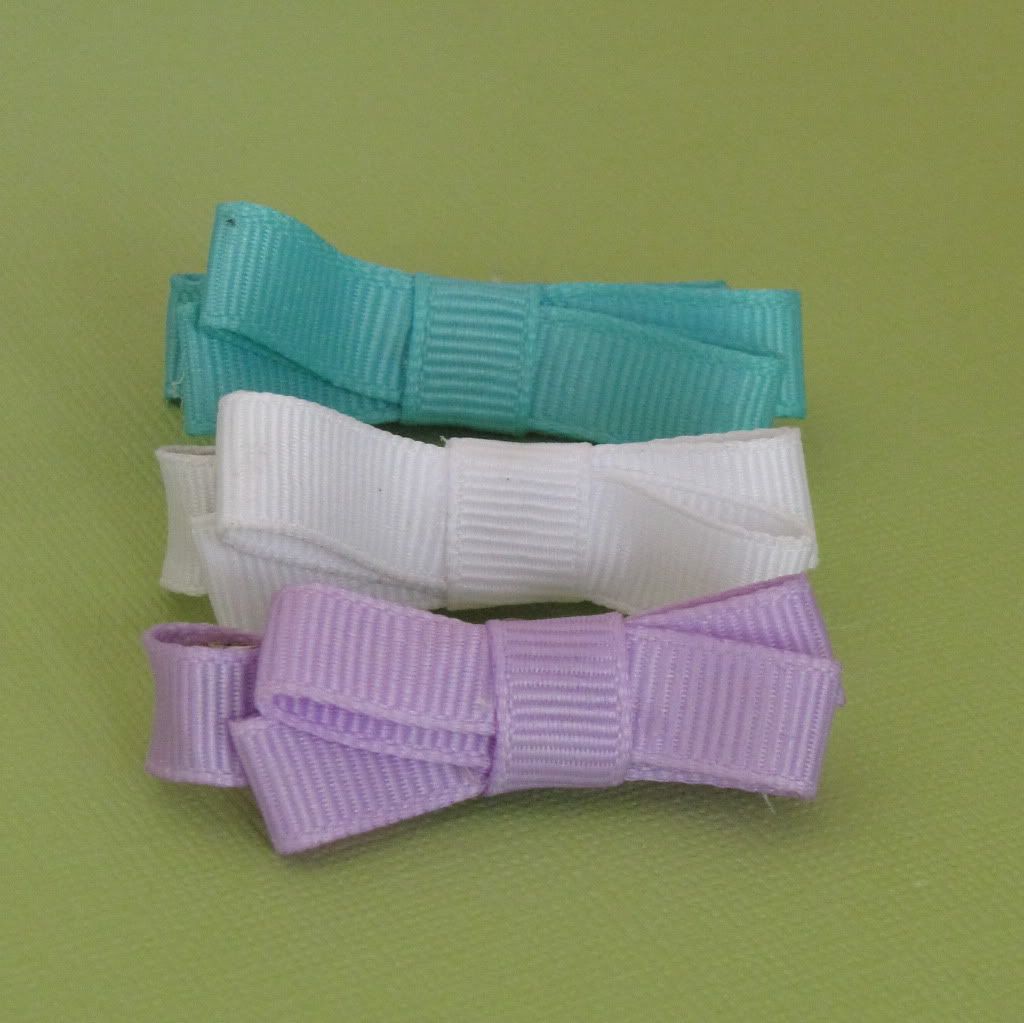
After you've added the glue, you're finished! All that's left is to make one to match each of your little girl's outfits.

What cute hair bows & it looks so easy. Thanks for sharing. What darling items you have in your etsy shop. I added you as a favorite :) Thanks for the blog visit and sweet comment!
ReplyDeleteHow cute - I'm going to try to make these for my niece!
ReplyDelete~Jessa
www.jessajill.blogspot.com