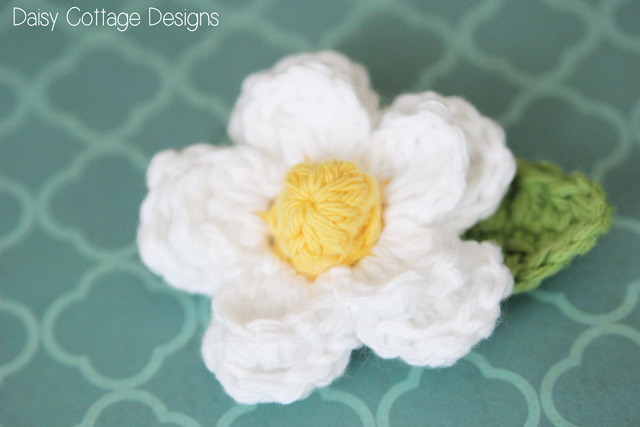
I'm currently going back through and taking better photos of some of my original patterns. It's kind of slow going since I actually have to go through and remake each item, but I'm enjoying the process. The original photo and pattern for this adorable daisy can be found here. I've added a bobble center and a cute little leaf, but other than that, the pattern is the same. And let's just all agree that my photography has improved at least a little bit through the years.
This flower is great for embellishing hats, headbands, bags, and more. Make it in a vast array of colors, or stick with the traditional yellow and white. Either way, you're sure to create a beautiful appliqué that some little lady will enjoy sporting this spring.
If you want to make your own daisy, here's what you'll need.
Materials:
- small amounts of worsted weight yarn
- tapestry needle
- something to embellish
Notes:
BPSC = back post sc
If you're unfamiliar with back post stitches, check out this tutorial. Let me just make a suggestion: before you get scared reading about back post stitches, pull out a hook and some yarn and just give it a try. It really is easier than it reads!

Daisy Pattern:
ch 2.
Round 1: Work 10 sc into the second ch from hook. Sl st in the top of the first sc. (Change color after this round if you'd like a different color center). Gently pull tail to tighten.
Round 2: Join new yarn in any stitch. *ch 2, skip 1 stitch, sc in the next st* four times. ch 2, skip 1, sc, sl st in the first chain 2 space to join. (total of 5 ch 2 spaces)
Round 3: ch 1, hdc, dc, 2 tr, dc, hdc, sl st in the same ch 2 space. *ch 1, hdac, dc, 2 tr, dc, hdc, sl st* in each remaining ch 2 space. You will have 5 petals when you finish this round.
Round 4: ch 1, *BPSC around the post of the sc on round 2. ch 3.* Complete 5 times. Sl st in the first BPSC to make the last ch 3 space. (total of 5 ch 3 spaces)
Round 5: *sl st, ch 1, hdc, dc 3 tr, dc, hdc, sl st* in each ch 3 space. You should now have a second row of petals behind the first.
Optional Bobble:
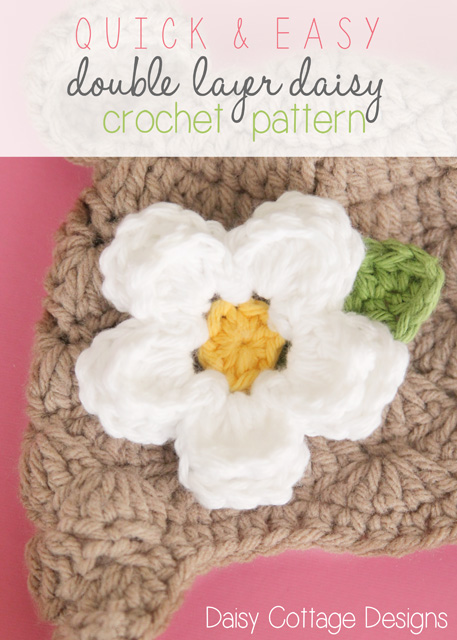
See the second photo to see what the daisy looks like without the bobble.
ch 3.
Round 1: 7 dc into the first st. Sl st to the top of the first dc. ch 1. (7)
Round 2: sc in each st around. Sl st to the top of the first sc. Cut yarn, leaving a long tail for sewing on the flower. (7)
I stuff the other tail into the bobble to keep it puffy. Sew the bobble onto the flower, cut yarn and weave ends.
Leaf Pattern:
ch 9.
Round 1: sc in the second st, hdc in the next, dc in the next 4 stitches, hdc in the next, sc in the next. ch 2.
Round 2: You aren't going to turn your work like you normally would; instead, you're going to be working into the other side of the leaf. sc in the first stitch, hdc in the next, dc in the next 4 stitches, hdc in the next, sc in the next, sl st in the first sc. Leave a long tail to attach to your flower. Using your tapestry needle, sew your leaf to the carnation. Cut yarns and weave ends.

Very cute ! Thanks so much for the pattern !
ReplyDeleteThanks for all your patterns-they are sooo cute. Would you be able to tell me the size of this flower? Am looking to make for a bookmark, but I don't want it too big.
ReplyDeleteThanks,
Wendy
Hello i love your flower but in the round 4 i am lost because i do not know where to put the hock. I make the the Bpst and the 3 chains and then it is so far the next petal. Thank you for your help.
ReplyDeleteIs there missing a dc in row 5? (sl st, ch 1, hdc, dc, 3 tr, DC(!), hdc, sl st)
ReplyDelete