This FREE! pattern is available in THREE more sizes here.
When my husband and I first got married, I got the "dog itch" pretty quickly. Just as fast, we realized that it definitely wasn't the ideal time for us to get a dog. Not able to get rid of the urge to get a pet, David and I bought a goldfish, some pretty stones, and a plant - his bowl was beautiful and we named our newest family member Elliot. I enjoyed watching him on the counter between the kitchen and the dining room. Several Elliots later, we decided to take a break from pets (after doing some reading, we realized that fishbowls weren't a good environment for goldfish).
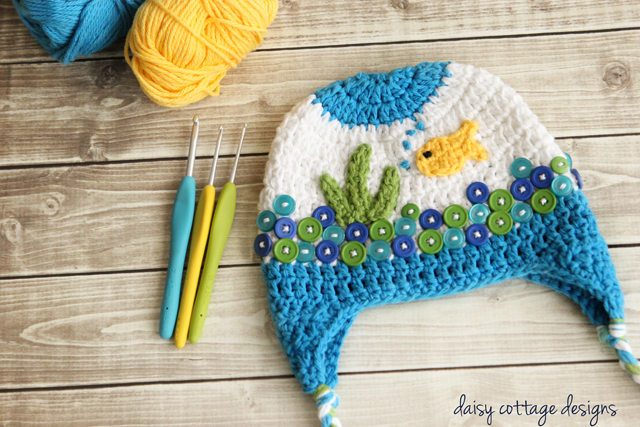
While getting ready for a garage sale, we found Elliot's bowl and rocks. It reminded me of how beautiful it always looked, and I thought it would be super cute to make a hat modeled after that bowl. Of course, I've got to share the adorable pattern with you, just in case someone wants to whip one up.

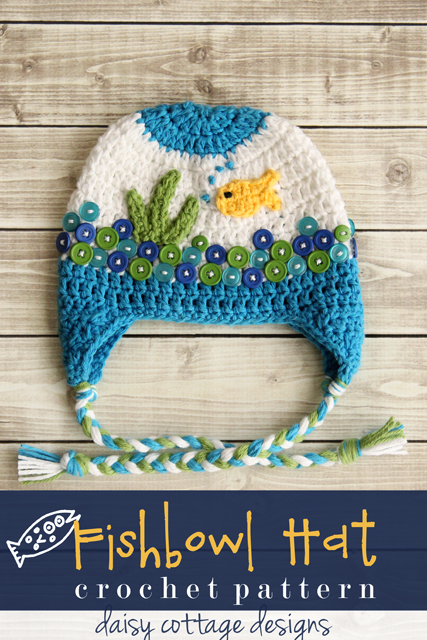
Fishbowl Hat Crochet Pattern
6-12 Month Size
Materials:
- Worsted Weight Yarn (turquoise or blue and white) - I used 100% cotton
- small amounts of green and yellow or gold worsted weight yarn
- Favorite Findings Buttons (434 - Blue Ocean)
- thread for sewing on buttons
- tapestry needle
Notes:
Chains do NOT count as the first stitch.
- thread for sewing on buttons
- tapestry needle
Notes:
Chains do NOT count as the first stitch.
Hat Pattern:
Using an I hook and blue yarn, ch 2.
Round 1: 8 sc into the first chain. Sl st to the top of the first sc. ch 2 (8)
Round 2: 2 dc into each stitch. Sl st to the top of the first dc. ch 2. (16)
Round 3: 2 dc into each stitch. Sl st to the top of the first dc. Cut yarn and weave ends. (32)
Round 4: Join white yarn with a sl st. Ch 2. 1 dc in the same stitch, 2 dc into the next stitch. *1 dc into the next stitch, 2 dc into the next stitch* around. Sl st to the top of the first dc. Ch 2. (48)
Rounds 5‐10: dc in each stitch around. Sl st to the top of the first dc. Ch 2. At the end of round 10, cut yarn and weave ends. (48)
Round 11: Join blue yarn with a sl st. ch 2, dc in each stitch around. Sl st to the top of the first dc. Ch 2. (48)
Round 12: dc in each stitch around. Sl st to the top of th efirst dc. (48)
Stop here and add one round of sc if you want a beanie. If you’d like an earflap hat, keep going without cutting yarn.
Earflap Directions:
Ch 1.
Row 1: hdc in the same stitch and in the next 11 stitches. Ch 1, turn. (12)
Row 2: hdc 2 together, hdc in the next 8 stitches, hdc 2 together. Ch 1, turn. (10)
Row 3: hdc 2 together, hdc in the next 6 stitches, hdc 2 together. Ch 1, turn. (8)
Row 4: hdc 2 together, hdc in the next 4 stitches, hdc 2 together. Ch 1, turn. (6)
Row 5: hdc 2 together, hdc in the next 2 stitches, hdc 2 together. Ch 1, turn. (4)
Row 6: hdc in each stitch across. Ch 1, turn. (4)
Row 7: hdc 2 together, hdc 2 together. Cut yarn and weave ends. (2)
You will now need to work the second earflap. On the front of the hat, skip 13 stitches and join blue yarn. You will work it exactly as you did the one above.
To finish the hat, sc evenly around the entire hat working two stitches in the corners of the earflaps. Cut yarn and weave all ends.
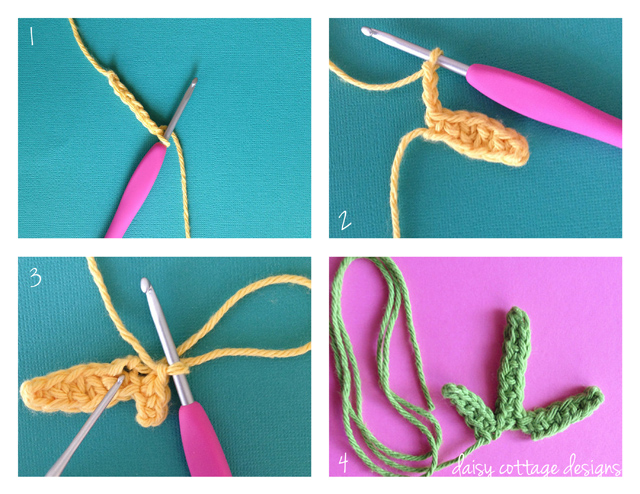
Goldfish Appliqué
Using an f crochet hook and yellow/gold yarn, ch 7 (photo 1).
Row 1: sc in the second ch from hook. hdc in the next, dc in the next 2 stitches, hdc in the next, sc in the next. ch 3. sc in the second ch from hook, hdc in the next. sl st in the same stitch. (Photo 2)
Row 2: ch 3. sc in the second ch from hook, hdc in the next. Sl st in the BACK of the first stitch on the opposite side of the fish (photo 3). hdc in the next stitch, dc in the next 2 stitches, hdc in the next stitch, sc in the next. ch 1, sl st to the first stitch of the previous row. Cut yarn and leave a long tail for sewing on the hat.
Grass Appliqué (see photo 4):
Using green yarn and an F crochet hook, ch 7.
sl st in the second ch from the hook. sc in the next 5 stitches. Do not cut yarn.
ch 10. sl st in the second ch from hook. sc in the next 8 stitches. Do not cut yarn.
ch 6. sl st in the second ch from hok. sc in the next 4 stitches. Cut yarn leaving a long tail for sewing on the hat. When you're finished you should have three "blades of grass" as shown in photo 4 above.
Braids:
For each side of the hat, cut 9 strands of yarn (I do three strands of 3 different colors) approximately 40 inches long. Fold them in half and pull the "loop" through the hat. Pull the loose ends through the loop to attach the yarn. Separate each color to make three strands. Then braid and knot at the end to secure. Cut yarn to make the ends even.
Round 1: 8 sc into the first chain. Sl st to the top of the first sc. ch 2 (8)
Round 2: 2 dc into each stitch. Sl st to the top of the first dc. ch 2. (16)
Round 3: 2 dc into each stitch. Sl st to the top of the first dc. Cut yarn and weave ends. (32)
Round 4: Join white yarn with a sl st. Ch 2. 1 dc in the same stitch, 2 dc into the next stitch. *1 dc into the next stitch, 2 dc into the next stitch* around. Sl st to the top of the first dc. Ch 2. (48)
Rounds 5‐10: dc in each stitch around. Sl st to the top of the first dc. Ch 2. At the end of round 10, cut yarn and weave ends. (48)
Round 11: Join blue yarn with a sl st. ch 2, dc in each stitch around. Sl st to the top of the first dc. Ch 2. (48)
Round 12: dc in each stitch around. Sl st to the top of th efirst dc. (48)
Stop here and add one round of sc if you want a beanie. If you’d like an earflap hat, keep going without cutting yarn.
Earflap Directions:
Ch 1.
Row 1: hdc in the same stitch and in the next 11 stitches. Ch 1, turn. (12)
Row 2: hdc 2 together, hdc in the next 8 stitches, hdc 2 together. Ch 1, turn. (10)
Row 3: hdc 2 together, hdc in the next 6 stitches, hdc 2 together. Ch 1, turn. (8)
Row 4: hdc 2 together, hdc in the next 4 stitches, hdc 2 together. Ch 1, turn. (6)
Row 5: hdc 2 together, hdc in the next 2 stitches, hdc 2 together. Ch 1, turn. (4)
Row 6: hdc in each stitch across. Ch 1, turn. (4)
Row 7: hdc 2 together, hdc 2 together. Cut yarn and weave ends. (2)
You will now need to work the second earflap. On the front of the hat, skip 13 stitches and join blue yarn. You will work it exactly as you did the one above.
To finish the hat, sc evenly around the entire hat working two stitches in the corners of the earflaps. Cut yarn and weave all ends.
Goldfish Appliqué
Using an f crochet hook and yellow/gold yarn, ch 7 (photo 1).
Row 1: sc in the second ch from hook. hdc in the next, dc in the next 2 stitches, hdc in the next, sc in the next. ch 3. sc in the second ch from hook, hdc in the next. sl st in the same stitch. (Photo 2)
Row 2: ch 3. sc in the second ch from hook, hdc in the next. Sl st in the BACK of the first stitch on the opposite side of the fish (photo 3). hdc in the next stitch, dc in the next 2 stitches, hdc in the next stitch, sc in the next. ch 1, sl st to the first stitch of the previous row. Cut yarn and leave a long tail for sewing on the hat.
Grass Appliqué (see photo 4):
Using green yarn and an F crochet hook, ch 7.
sl st in the second ch from the hook. sc in the next 5 stitches. Do not cut yarn.
ch 10. sl st in the second ch from hook. sc in the next 8 stitches. Do not cut yarn.
ch 6. sl st in the second ch from hok. sc in the next 4 stitches. Cut yarn leaving a long tail for sewing on the hat. When you're finished you should have three "blades of grass" as shown in photo 4 above.
Braids:
For each side of the hat, cut 9 strands of yarn (I do three strands of 3 different colors) approximately 40 inches long. Fold them in half and pull the "loop" through the hat. Pull the loose ends through the loop to attach the yarn. Separate each color to make three strands. Then braid and knot at the end to secure. Cut yarn to make the ends even.
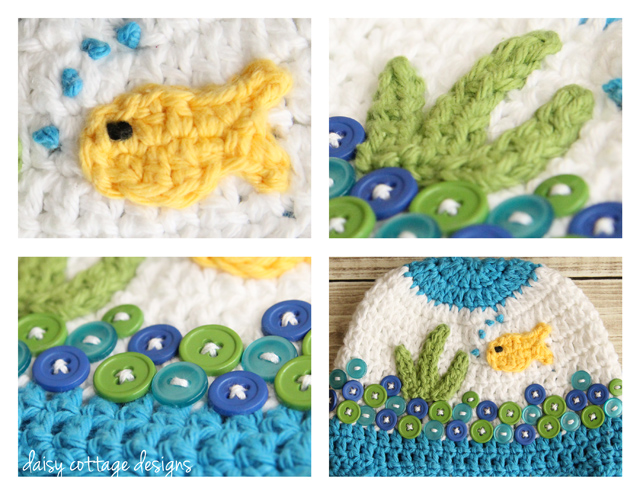
Once you have your hat made and the grass and goldfish finished, you'll need to sew on your buttons. I suggest placing them on the hat first to see how you're going to want them arranged. After you've sewn on the buttons, use a tapestry needle to sew on the grass and fish. I used a french knot to make the eye on the fish and the bubbles coming up from his mouth. This is a great tutorial on how to make French knots on crocheted or knitted items.

I adore this! Just curious what brand of cotton you use. It looks so soft. :)
ReplyDeleteI think this is a stunning design - colors, layout, buttons! Very creative. Thank you for sharing it.
ReplyDeleteThis is sooo cute!
ReplyDeleteO K, that's it! I now have a running list of 'Lauren' projects to Do! lol Thank you for the inspiration to crochet again! ox
ReplyDeleteKimberlyRae
This comment has been removed by the author.
ReplyDeleteHello! I am new to your site and I absolutely LOVE it! So much fun! I will be sharing it on my social media!
ReplyDeleteThis is too lovely! I will be adding it to my queue for my little one! Thanks for sharing!
ReplyDeletewww.mysplendidfamily.com
Hi, me again! I'm looking at the newborn pattern and there's no round 9...? Also, on the top of the hat in blue looks like theres 3 rounds Not 2 rounds...? THANKS!
ReplyDeleteHello, Lauren,
ReplyDeleteThis hat is just too too cute! Such a clever design. I also, wanted to comment on the pet issue. We have several canine and feline family members and in 2007, inherited a hermit crab when grandsons lost interest in their pair of hermies and one of them (Spiffy) did not survive the neglect, Cletus became very depressed and withdrawn after his roomie's demise. I witnessed Cletus discovering Spiffy's lifeless body and it was one of the most incredible (traumatic/tragic) things I have ever been witness to. As a ClinicalSocialWorker/Psychotherapist for 30+ yrs now retired I have heard and seen more than anyone ever should. :( Believe it or not, Hubby and I grew very attached to Cletus who passed in 2012. I can highly recommend hermmies as pets. They are quite social despite what their name implies. Cletus loved bath day, being sung to, getting to take long walks up and down Nana and Papa's arm, walking laps around his round bowl, climbing driftwood, hemp/cotton net, antler shed by deer, and what ever cool, natural materials we found for him that his bowl could accommodate. We debated several times about providing him a new roomie (bowlie?) but he seemed content with our abundant love and attention. Just something to consider if you'd like another little companion. Thank you so much for designing and sharing this oh-so-cute-cute-cute fish bowl hat! Your talent and creativity are exceeded only by your generosity! ~Blessings~